Showing posts with label Baking. Show all posts

peanut butter cookies with pretzels and chocolate chunks


Sweet and salty, chewy and crunchy, chocolate and peanut butter. These cookies are a pregnant gals dream come true (well, aside from maybe unlimited free foot massages).

These cookies are delicious, and also a little less guilt-inducing than the recipe on the back of a chocolate chip bag: they contain no butter and are partially whole wheat. At least, that's the excuse I am giving myself for eating three consecutively after lunch today.


Peanut Butter Cookies with Pretzels and Chocolate Chunks
adapted from "Peanut Chews" from the King Arthur Flour Whole Grain Baking book

1 c smooth all-natural peanut butter
1/2 c dark brown sugar
1/2 c white sugar
1 large egg
1/4 c water
2 tbsp corn syrup (honey also works here)
1 tsp vanilla
1 tsp baking soda
1/2 tsp salt
3/4 c whole wheat flour
3/4 c white flour
heaping 1/2 cup pretzels, broken into small bits
3 or 4 oz dark chocolate, chopped
course salt (I was classy and dug out the pretzel salt from the bottom of the bag, this worked out quite well)

Cream together the first nine ingredients (peanut butter through salt), until smooth. Add the flour and stir until combined. The dough will become very stiff, use a stand-up mixer if you have one. Stir in the pretzels and chocolate.

Drop heaping tablespoon-fuls onto a lightly greased baking sheet. Either flatten the cookies by pressing a pretzel into the top of each one, or you can do the classic criss-cross shape using a fork (dip the fork in water when it begins to stick to the dough). Sprinkle with salt.

Bake the cookies for 9-12 minutes at 350 degrees, rotating the baking sheets half way through. The key here is to remove the cookies as the edges are beginning to brown, but the middles are just a bit on the wobbly side still. This will ensure chewy cookies with crisp edges. If they bake too long, they will harden.

Eat warm. Enjoy.

Read more...

tiny sesame crackers


Just the other day I declared to my husband that I was through baking with James. I usually love to cook with him: letting him stir things, add in ingredients, push the button on the food processor. But lately he has been following his own creativity in the kitchen, and sometimes we just don't see eye to eye on things.


For example, he thought there should be chili powder in the lentil mix for the wraps I made. He also thought chili powder would add a nice touch to the dining room floor. In addition, he seems to be following the school of thought that you can just throw as much or little of any ingredient into a bowl, bake it, and it will turn out just fine, regardless of how many times I may say "No, James, we have enough flour in the bowl now." Or, "James, you have already doubled the baking powder that was called for, please don't put any more in."


Despite my declaration to bake only at nap time or at night, I caved today when he decided he wanted to put on his apron and "help" make something. I figured we could use some snack crackers, so I grabbed the whole grain cook book and thumbed through to see what we could make from the ingredients in our pantry.


This resulted in James eating spoonfuls of sesame seeds ("Good!") and pouring sugar everywhere. He somehow also managed to get sesame seeds on his chubby little feet.


Sigh. At least the crackers turned out delicious.


Tiny Sesame Crackers
adapted from King Arthur Flour's Whole Grain Baking


1 c whole wheat flour
1/2 c all purpose flour
1 tbsp sugar
1 tsp baking powder
1/2 tsp salt
3 tbsp butter, chilled
5 tbsp sesame seeds
1/3 c milk
1 tsp sesame oil (optional)

Combine the first five ingredients in a large bowl. Cut in the butter with a pastry blender or your fingers until the butter is well incorporated and the texture is like cornmeal. Stir in the sesame seeds.

Heat half the milk with the sesame oil over medium heat until warm. (skip that step if not using the oil) Combine all the milk and the oil together into the flour mixture. Mix well to combine until a thick dough forms.

Place half the dough on a lightly floured surface and roll out to about a 7 inch by 8 inch rectangle. Cut into 1 inch square crackers and transfer to non stick baking sheet or a baking sheet lightly coated with cooking spray. Bake at 325 for 15-17 minutes, or until the crackers are firm and the edges are just beginning to become a golden-brown. Repeat with the other half of the dough. Roll out the scraps from the first two batches only once, otherwise it will become too tough.

Cool on a wire rack and store in an airtight container. Enjoy.

Read more...

lentil wraps with tahini sauce in homemade pitas


I am a little disappointed in myself for completely ignoring the holiday last weekend which would have given me every excuse to get my Latina blood flowing and create some sort of Central American themed delights. Instead, we spent the weekend running around like chickens with our heads cut off.


First of all, I worked two shifts at my favorite coffee shop. After the shift Saturday (which began at 5:30, mind you) we headed over to my cousins for a Cinco de Mayo/ birthday/ house warming. On Sunday we were supposed to attend another house warming after I was off work, but found out that a potential renter was going to come see our house, so we frantically scrubbed, then ran to the park right in time for them to show up. (Luckily, they liked the place, so our landlords will not have a house sitting vacant for long. On the other hand, maybe this means we should start packing?)


On our way to the multi-themed party we swung by Trader Joe's to buy some flowers, and a snack. The snack was a wrap similar to this one, but I was sure I could make it better at home. Not to brag, but I was right.


Lentil Wraps with Tahini Sauce in Homemade Pitas

for the lentil mixture:
1 1/2 cup cooked lentils
1/2 cup chopped white onion
2 tbsp olive oil
2 tbsp water
3/4 tsp salt
1/4 tsp cumin
1/4 tsp black pepper
1 tbsp lemon zest
1/2 cup parsley

for the tahini sauce:
1/4 c sesame seeds
2 tbsp olive oil
1 tbsp water
large garlic clove, chopped
1/4 c parsley
1 tbsp lemon juice
large sprinkle salt
pinch red pepper flakes
sprinkle cumin

Combine all the lentil mixture ingredients in a food processor or blender and blend until smooth. Do the same with the tahini sauce ingredients. I was not able to make the tahini sauce a smooth mixture; adding liquid seemed to help, I would like to know the secret to this if anyone has better luck.


for the homemade pitas:
adapted from Bread Machine Magic
1 1/8 cups water
2 c all-purpose flour
1 c whole wheat flour
1 tsp salt
1 tbsp olive oil
1  1/2 tsp sugar
1  1/2 tsp Red Star active dry yeast for bread machines

Combine ingredients in bread machine*, and select "dough" setting. (Or if you have a machine like mine, set it so that only the first two cycles, knead and first rise, are accomplished.). Once it is done, turn out the dough onto a lightly floured surface. Roll it into a thick log. Cut the log into two even pieces, and continue to divide pieces until you have eight similar sized pieces. Using your hands, roll these into balls. Then, using a rolling pin, roll into discs about 6 inches in diameter. Cover them with a clean kitchen towel and allow to rise while you preheat the oven to 500 degrees (about 20 minutes).

When the oven is ready, bake the pitas on a non-stick or slightly floured baking sheet, four at a time, for about 5 minutes. When you remove them from the oven, place them on a plate and cover with a damp towel so that they soften, about ten minutes.

*If you don't have a bread machine, these look pretty darn good also.


Toppings for the wraps:
shredded cabbage
thinly sliced bell pepper
thinly sliced red onion
spinach (I didn't try this, but I think it would also be good)
lemon wedges

Assemble your wraps: Cut open each pita half way and layer lentil mixture, tahini sauce, cabbage, bell peppers, red onion, any leftover parsley, or whatever else sounds good. Serve with lemon wedges on the side. Enjoy.

Read more...

blueberry lime scones


The last 24 hours have been a bit chaotic around here because, as you may know since I keep bringing it up, we finally bought a house after our crazy house hunt, and I was informed Tuesday afternoon that a potential renter is coming to look at our rental house tomorrow morning.


Our landlords have been so amazing to us that I want the house to look perfect and be absolutely spotless when the possible renters come to take a look at it. Unfortunately, due to recent illness (and the fact that one of the current renters is a toddler) our house is the opposite of spotless. My list of "to-dos" for today was about a mile long and included, but was in no way limited to: "deep clean bathrooms, deep clean kitchen, sweep and scrub all floors"... on and on it went. I had plans to go visit my dad, but cancelled so that I could stay home and clean. By about dinner time I decided that the house was actually probably in worse shape than if we had been gone all day. I have been trying to think of something witty to write on our chalkboard that would explain the mess to the people who will be touring through our home, but all I can think of is simply writing "I wish I could say it doesn't always look like this."


I am definitely the type of person that adds things to my to-do lists that were not there originally, but I need the satisfaction of crossing them off. Over the last two days it has been things like: "play at the park, stay up way too late watch episodes of Monk when I should be cleaning or sleeping, make scones a third time in less than a week to make sure the recipe I made up is actually good"... which brings me to the real point of this post: the scones.


After making three batches, James and I have deemed the recipe "blog worthy" and so here it is. And, honestly, I'm not too sad that we had to experiment by making three batches (he helped with every one of them) when we should have been scrubbing the floors.


Blueberry Lime Scones
makes 8 good sized scones

2 cups flour (I used 1 all-purpose and 1 whole wheat pastry)
1/3 cup sugar
4 tsp baking powder
1/2 tsp salt
zest of 1 or 2 limes
1/2 c butter, cold and cut into cubes
1/2 c milk (anything from heavy cream to soy milk will work)
1 egg
1/4 cup fresh lime juice
1 c blueberries (I used frozen and tried to remove excess moisture)
1 tbsp turbinado sugar (sugar in the raw)

Place dry ingredients (flour through lime zest) into a food processor and pulse until mixed well. Add butter and pulse until a mixture resembling course sand has formed.

Beat the egg into the milk and pour into the dry ingredients, pulsing to incorporate. Add lime juice, mixing the  entire time. Gently stir blueberries into the dough.

Turn the dough out onto a well greased baking sheet and form into a round, flat shape, about 1 inch thick. Cut into 8 wedges and attempt to separate the wedges. (If this doesn't work, you can also remove after baking about 15 minutes and separate the wedges then.) Sprinkle evenly with the turbinado sugar. Bake at 400 degrees for about 20 minutes, or until the scones are light brown on top. Serve warm. Enjoy.

Read more...

morning glory muffins


Yawn. Everyone has had a morning glory muffin, right? Nothing new. They are the ones that are "healthy" because they are full of carrot, apple, and nuts.


I have had my share of muffins that are supposed to be healthy, but are actually comprised of oil, white flour, and sugar. Not my muffins. Oh no.

I started by reducing the sugar and eliminating the raisins (in my opinion they have no business being in muffins, or, while we are on the subject, cinnamon roles either). Then I substituted water and flax meal for one of the eggs, and yogurt for part of the oil to keep them nice and moist. The result is a hearty yet delicate muffin. I have been eating them in twos, which is a terrible idea because they actually are very filling.


I am not completely sure of the exact measurements of the ingredients that went into the muffins. You see, James was helping me. He was also eating shredded carrot out of the bowl as soon as I would put it in. So, here is my best shot:

Morning Glory Muffins
adapted from King Arthur Flour's Whole Grain Baking
recipe says it makes a dozen, I got 16


2 cups whole wheat pastry flour
3/4 brown sugar
2 tsp baking soda
2 tsp cinnamon
1/2 tsp ginger
1/2 tsp salt
2 cups grated carrot
1 Granny Smith apple, peeled and grated
3/4 cup large unsweetened coconut flakes
1/2 cup chopped walnuts
2 eggs
1 tbsp flax meal + 3 tbsp water
1/3 cup lowfat or nonfat yogurt
1/3 cup canola or olive oil
juice of 1 orange

Whisk together the first ten ingredients (flour through walnuts). In a separate bowl, beat together eggs, flax meal, and water. Add yogurt, oil, and orange juice, and beat well. Stir in flour mixture until evenly combined.
Coat a muffin tin with cooking spray or line a with papers and coat them with cooking spray. Bake at 375 for about 25 minutes. Allow to cool in tin about five minutes before removing and setting the muffins on a cooling rack to cool completely. Enjoy.

Read more...

Orange-Pecan Cranberry Jammers


I feel like I should catch you up to date after this post in which I bragged about all of the fun events I was looking forward to.

First was Body Worlds and OMSI after dark. Body Worlds was A. MAZE. ING. Like, the most amazing thing I have ever seen. (Okay, in the top five.) However, I couldn't take any pictures in the exhibit, so you will just have to go see it for yourself. Pictures were allowed in OMSI after dark, but I really didn't want to go all the way out to my car and get the camera after Body Worlds. But I do have some photos from the rest of my activities to share with you...

Friday night was the At First Sip book signing:


Saturday night was Zoo Lights: 


As we neared the exit off 26 for the zoo, we noticed signs along the road reading "Zoo parking full, take next exit." The signs off the next exit led us to a long line of cars that were waiting to get into the packed parking lot where people were being shuttled in school buses to the zoo. After finally parking, we entered the winding line of  teens (all apparently on dates and too cool to be wearing winter gear) and bundled children, parents, and grandparents.


It was, indeed, freezing, but we were happy to be on our way to see the lights and the animals, and James was content to watch the goings-on all around us, as well as the school buses that were quickly filled up, leading us closer and closer to our destination.


Finally it was our turn. We sat near the back of the bus, feeling like excited kids going on a field trip.


Once we got there, Lane's awesome company supplied us with hot chocolate, cookies, and tickets for the train ride, which we didn't go on because the line to go on the train was about twenty two miles long, and we would still be waiting to board.


But no train ride was needed because the lights were beautiful, the animals were not all asleep (poor guys), and the best part was that everyone seemed to be in a joyful holiday mood.


And now, to get to the stinkin' scones already. 


I was going to get up early on Sunday morning and continue our fun-filled family holiday weekend with fresh, seasonal scones. 


But I woke up to a crying child who was whining for the same reason I did the rest of the day: sore throat, headache, faucet nose. (I know, I know, I already felt sorry for myself in the last post...)


So instead of making them Sunday, I began to make these scones in the chaos after a grocery shopping trip on Monday mid-morning. The counters were piled high with groceries I hadn't put away, the floor was littered with pots and pans that I tried to amuse James with, and the scones were made in several stages throughout the rest of the day.

I did learn, however, that they can be made with a baby 30+ pound toddler on one hip.

Orange-Pecan Cranberry Jammers
basic scone recipe and directions adapted and shamelessly copy-and-pasted from Cindy's comment on this recipe
makes 8 scones
1 cup all-purpose flour 
1 cup whole wheat pastry flour
2 tablespoons sugar 
1 tablespoon baking powder 
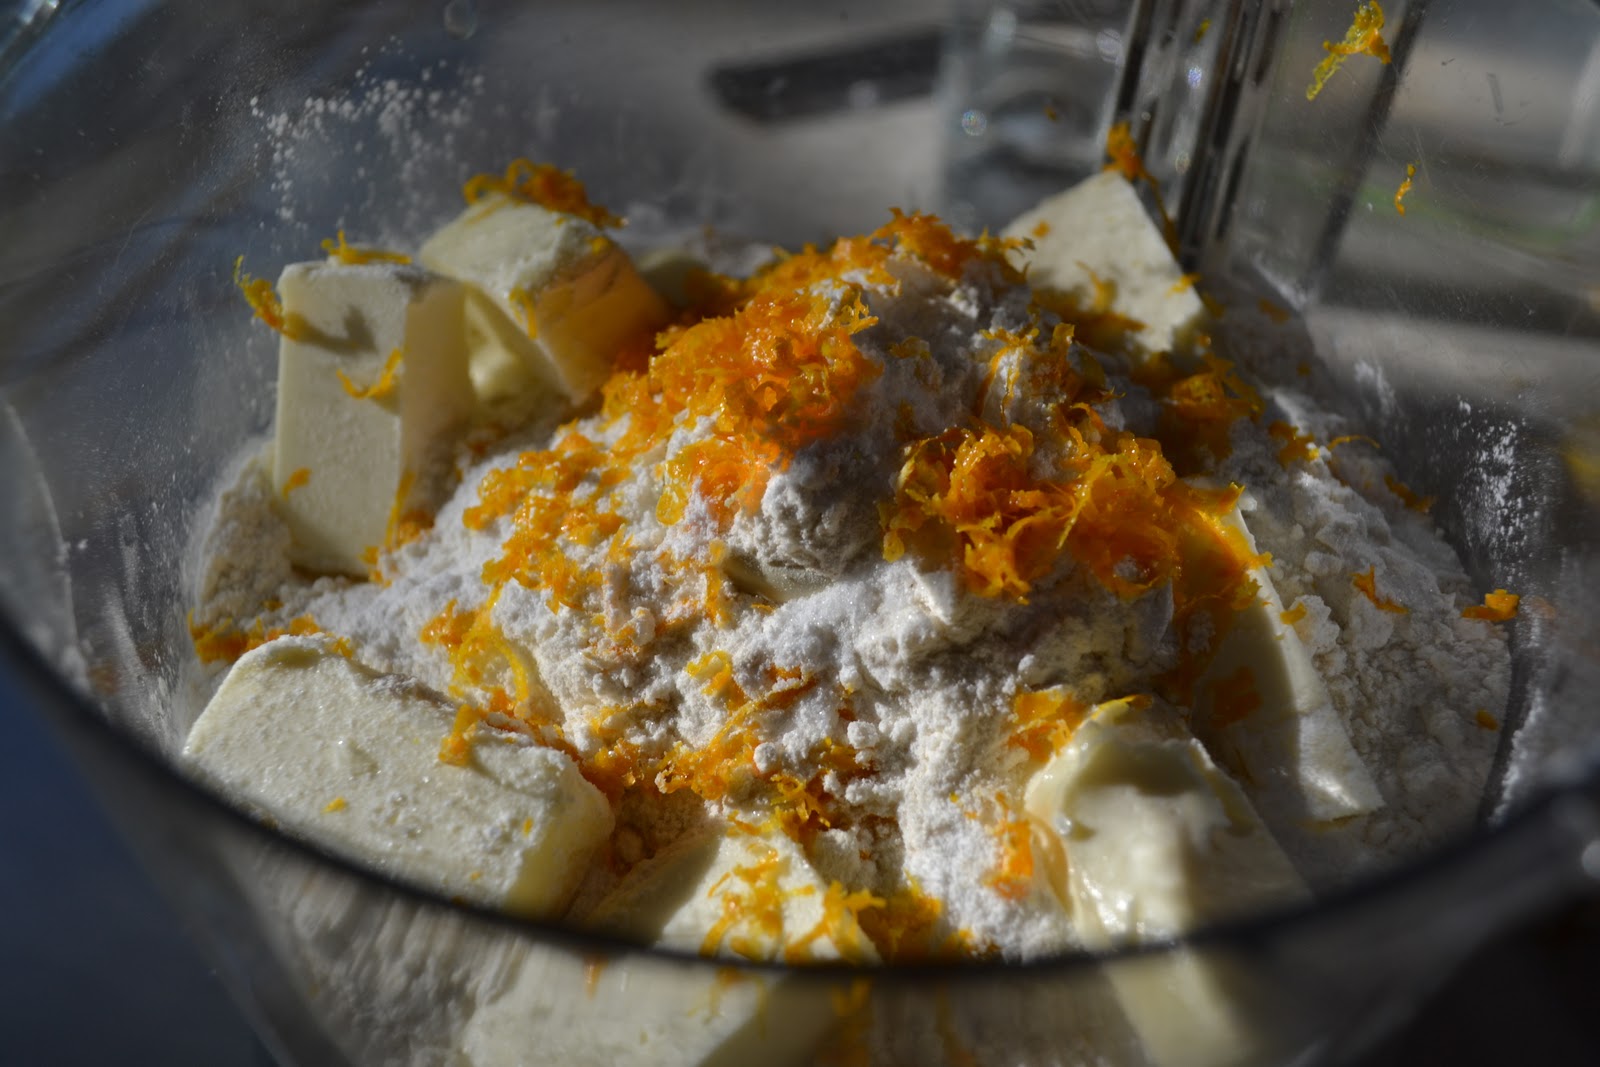
zest of 1 orange
6 tablespoons butter (cut into several pieces)
1 egg 
1/2 cup milk
1/3 cup pecan pieces
about 1/2 cup cranberry sauce
about 1 tbsp raw sugar (optional) for sprinkling

Preheat oven to 400 F. Assemble ingredients.

Food processor instructions: Add first four ingredients to processor bowl. Add orange zest and butter, and process with steel blade until mealy in texture. Add egg and milk and process just until the mixture holds together. 


By-hand instructions. Blend first four ingredients in large bowl. Add zest. Add butter and mix in with pastry cutter or fork or two butter knives, until mealy. Add egg and milk until the mixture holds together. 


Turn dough out onto a lightly floured surface, gently knead in pecan pieces (do not over knead) and roll 3/4" thick. Cut into 8 wedges, and place on lighlty greased baking sheet, spread apart from one another so that they will not touch as they bake.


Bake about 12 minutes in the preheated oven, or until golden brown. Let cool a few minutes before enjoying with a hot cup of coffee or tea. Enjoy.


PS They are called "jammers" because they remind me of similar scones I used to get on the weekends from Grand Central Bakery near my childhood home. I don't know if they were actually called jammers, or if that was a name my family made up.
PPS My friend, Katie, just cleared it all up. She sent me this link to the kitchen tour of the genius behind the original jammer. Grand Central Bakery does indeed call them jammers. But I should state, just for the record, the the similarity between these scones and theirs is only in the appearance as I remember it from when I was younger.

Read more...

Peppery Thin Wheat Crackers


I have discovered that snacks disappear much faster when you make them yourself.
For example, the pan of granola bars I made only Saturday are mostly gone (recipe coming soon when perfected), although the Costco box of Nature Valley bars has been sitting in our pantry for at least a month and is still over half full.
Perhaps this is because we know what goes into our homemade snacks, and so we feel better about eating them. Or possibly because we don't have to open a bunch of packaging (and glance over the horrifying nutritional panel) to get to them. But honestly, I think it is actually because homemade snacks are so much more delicious than their store-bought counterparts.


And, of course, much more labor-intensive.


The recipe I adapted is from the King Arthur Flour Whole Grain Baking book which, for some reason, was the last place I looked for a whole-grain cracker. Sometime last spring I made these cheese crackers for James from the online encyclopedia of all things delicious: Smitten Kitchen. Although I love all of Deb's recipes (I like to imagine that we are on a first name basis) and the crackers were fabulous tasting, they were also a bit greasy, heavy, and guilt-inducing, not what I wanted from a snack cracker. The King Arthur crackers, however, were light, thin, and crispy. The only reason I felt guilty from these crackers was because I ate half the batch. Not kidding.


Although there are countless adaptions to this recipe (added herbs, honey instead of sugar, garlic and parmesan, cinnamon and sugar...) I kept the recipe simple so that I could see how I liked the results, and go from there. There should be many more interesting adaptations to come.

Peppery Thin Wheats
1 1/4 cups whole wheat flour
1 tbsp sugar
1/2 tsp salt
1/4 tsp cracker peppercorn
3 tbsp butter, at room temperature
1 tbsp olive oil
1/4 c water
canola oil cooking spray

Combine flour, sugar, salt, and cracker pepper. Cut in butter and drizzle mixture with oil. Use your hands (or a pastry cutter, but hands work better in my opinion) to thoroughly blend the fats into the flour mixture. Add the water, mix in with your hands.
Divide the dough into four balls. Keep the balls you are not using covered with plastic wrap (I don't know why, bit it is what the recipe says, I assume for moisture reasons). Roll each ball out to 12 inches square. (Now, this is the part that really confused me. It is impossible to roll 1/4 of the dough out to 12 inches by 12 inches. That is why it says: "12 inches square," meaning 6 inches by 6 inches. I am not a math major.) So, each side should be 6 inches. Cut off the excess dough (later roll all the excess out and cut into crackers). The crackers should each be about 1 1/2 inches wide. Bake the crackers on a lightly greased baking sheet for about 7 to 10 minutes at 400 degrees. Watch the crackers closely. You want them to be a golden-brown color and crispy all the way through, not light or dark brown. Let them cool on a plate, then immediately store them in a Tupperware so that you don't eat them all. Enjoy.

Read more...
\