Showing posts with label Desserts. Show all posts

peanut butter cookies with pretzels and chocolate chunks


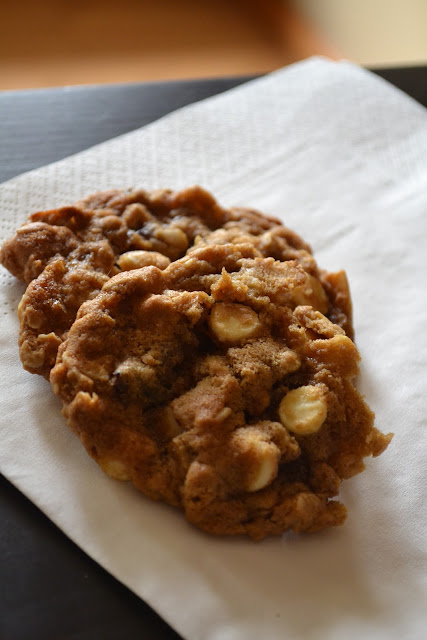
Sweet and salty, chewy and crunchy, chocolate and peanut butter. These cookies are a pregnant gals dream come true (well, aside from maybe unlimited free foot massages).

These cookies are delicious, and also a little less guilt-inducing than the recipe on the back of a chocolate chip bag: they contain no butter and are partially whole wheat. At least, that's the excuse I am giving myself for eating three consecutively after lunch today.


Peanut Butter Cookies with Pretzels and Chocolate Chunks
adapted from "Peanut Chews" from the King Arthur Flour Whole Grain Baking book

1 c smooth all-natural peanut butter
1/2 c dark brown sugar
1/2 c white sugar
1 large egg
1/4 c water
2 tbsp corn syrup (honey also works here)
1 tsp vanilla
1 tsp baking soda
1/2 tsp salt
3/4 c whole wheat flour
3/4 c white flour
heaping 1/2 cup pretzels, broken into small bits
3 or 4 oz dark chocolate, chopped
course salt (I was classy and dug out the pretzel salt from the bottom of the bag, this worked out quite well)

Cream together the first nine ingredients (peanut butter through salt), until smooth. Add the flour and stir until combined. The dough will become very stiff, use a stand-up mixer if you have one. Stir in the pretzels and chocolate.

Drop heaping tablespoon-fuls onto a lightly greased baking sheet. Either flatten the cookies by pressing a pretzel into the top of each one, or you can do the classic criss-cross shape using a fork (dip the fork in water when it begins to stick to the dough). Sprinkle with salt.

Bake the cookies for 9-12 minutes at 350 degrees, rotating the baking sheets half way through. The key here is to remove the cookies as the edges are beginning to brown, but the middles are just a bit on the wobbly side still. This will ensure chewy cookies with crisp edges. If they bake too long, they will harden.

Eat warm. Enjoy.

Read more...

Maple, Berry, and Pear Dessert


I've been thinking about my little blog a lot lately, and planning in my head several posts that may or may not ever come to fruition. The reason I have been thinking more than blogging? Could it be because I am too busy taking care of a 60 pound dog who had a tumor removed from her head and we now lovingly call her Frankendog? No. Possibly because my toddler has a terrible cold and he nor his parents can ever sleep due to the coughing? Wrong again. Then it must be the obsessive house hunting that has seemed to take over my life?...


The actual reason is that every time I get on my computer to write a blog, I get side tracked reading other people's, and before I know it an hour has passed, nap time is over, and it's back to reality.

Reading all my friends blogs is seriously like a part-time job (that I don't get payed for and love doing... so maybe not like a job), and is even more time consuming when they post like everyday.


Anyway, here is a little recipe I threw together last night because we had a sweet tooth and needed something to go with our vanilla ice cream. Oh, and I needed to remedy the fact that I bought pears at Costco and they all ripened at once.

Maple, Berry, and Pear Dessert
3 1/2 cups pears, peeled and sliced
1 1/2 cups berries (frozen then thawed, of course, unless you live on a different planet where berries are actually in season)
1/4 cup maple syrup
1 tsp vanilla
2 cups oats
1 1/2 cups packed brown sugar
1 1/2 tsp cinnamon
1 tsp freshly grated nutmeg
pinch of salt
6 tbsp butter, chilled and cut into small (pea-sized) pieces
vanilla ice cream, for serving

Combine the fruit, maple syrup, and vanilla in the bottom of a baking dish.
Mix together the oats, brown sugar, spices, salt, and stir in the butter pieces. Sprinkle oat mixture evenly over berry mixture and bake 35-40 minutes at 400 degrees.
Serve hot over cold vanilla ice cream. Enjoy.

Read more...

No-Bake Cookies, Lightened


....okay, maybe not lightened. They are still dense, chewy, and chocolaty. But I did remove over half the sugar, halved the butter, and added some extra cocoa for a rich chocolate taste, and some peanut butter for gooey-chewy denseness. Doesn't sound like much compromise, huh?


To lighten the cookies even more you could simply melt chocolate chips and peanut butter together, then stir in some oats. I will have to do some further investigation.

No- Bake Cookies, Lightened 
by request of Jane, from her comment on this post
recipe adapted from several that I found on allrecipes.com
makes one dozen

3/4 cup brown sugar (or white, but I feel that brown sugar is richer tasting)
1/3 cup cocoa powder
1/4 cup butter or trans-fat free tub margarine
1/2 cup non-fat or low-fat milk
pinch of salt
3 cups oats (quick oats work best)
heaping 1/2 cup all natural peanut butter
2 tsp vanilla
cooking spray

Coat a muffin pan with cooking spray or fill with liners.

Combine the sugar, cocoa powder, butter (or margarine), milk, and salt in a small saucepan. Bring ingredients to a boil and cook about a minute, stirring. Remove from heat and add oats, peanut butter, and vanilla, stirring well to combine. Pour evenly into the prepared muffin tin. Place in refrigerator to cool for about 10 minutes. Carefully remove the cookies from the muffin tin and wrap individually in plastic wrap before you eat them all. Enjoy.

Read more...
Cherry-Orange-Almond Turtles


To those of you who have had enough already of all the candy and sweets this time of year brings: this post is not for you. To those of you who are still here: I'm glad that I'm not the only one.


I can never seem to lose my sweet tooth, no matter how many baked or frozen sugary desserts I eat. And every year around this time I notice it catching up to me. Or um, er... to my thighs.


Which is very unfortunate since I have a freezer full of chocolate that I received in various stockings from my husband, my in-laws, my parents...


So I have decided to take it out, bar by bar, and try to create semi-healthier concoctions from all that delicious sugar and cocoa. The first idea on my list: turtles. (Why are they called that? So unappealing.)
 

I melted down a dark chocolate bar (85% cocoa) and added dried cherries (cocoa and cherries- just think of all those antioxidants! It's practically a health food) and almonds for protein to keep your metabolism going just a little longer after dessert. The resulting bar has about 225 kcals and 7 grams of protein each (not bad, eh?). It is just sweet enough to keep my baked-good cravings at bay... for perhaps a week, when all the turtles will have gone extinct. Then, all bets are off.

Cherry-Orange-Almond Turtles
makes 6
3.5 oz dark chocolate (the darker the better), broken into small pieces
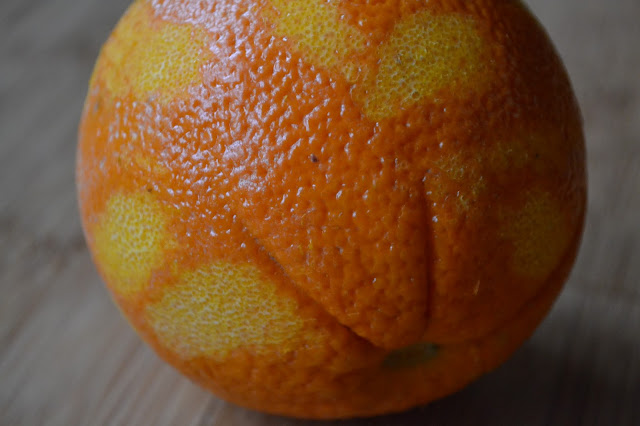
zest of 1 orange
3 oz almonds; about 1/2 cup
3 oz dried cherries; about 1/2 cup

Melt the chocolate in a small sauce pan over medium-low heat, stirring constantly. Add zest and mix well. Add almonds and cherries and stir until combined. Pour mixture out into six even piles on wax paper and allow to cool and harden completely before eating. Enjoy.

Question: Does anyone have any foods they can't live without but need lightened up? After all, it is almost the new year... ugh, I can't believe I just said that...

Read more...

White chocolate cranberry coconut oatmeal cookies

Sometimes you have to have something really sweet, so you buy white chocolate chips.


But then you decide you also need some tart in there, so you add cranberries.


However, you also need chewy and flaky, so you throw in some oats and coconut flakes.


And then you start to feel guilty about the complete lack of nutrients coming from your baking endeavors, so you choose a Cooking Light recipe to adapt, to make yourself feel better.


But in the end, you double the recipe because they are that good.

White chocolate cranberry coconut oatmeal cookies
adapted from this recipe by Cooking Light
1 stick (1/2 cup) butter
1 cup brown sugar
1/4 cup white sugar
2 tsp vanilla
1 egg + 1 egg white
1 1/2 cup all purpose flour
1 cup oats
1 cup large unsweetened coconut flakes
1/2 tsp salt
1 tsp baking powder
1 cup white chocolate chips
3/4 cup dried cranberries
In a large bowl, beat together butter and the sugars, add vanilla and the egg and egg white and beat until smooth.
In a separate bowl, whisk together flour, oats, coconut, salt and baking powder.
Add dry ingredients to wet, mixing well. Mix in chocolate chips and cranberries.
Bake on a non-greased cookie sheet for about 10 minutes and let cool on baking sheet 2 minutes before transferring to cooling rack. Enjoy.

Read more...

(edible) Summer host/hostess gift #2


I know its been a while since my first installment in the "series" of edible summer hostess gifts, but here (finally) is the second.


Just imagine: it's a hot summer day; everyone is full from burgers and potato salad, but craving a little something light, refreshing, and sweet. The host/hostess then announces: "Thankfully (insert your name here) brought Creamy Coconut Popsicles." You are now the hit of the party (at least, the popsicles are).


Yeah, you're welcome.


Also, there is no reason you need to tell everyone that the whole gift cost less than five bucks.


Creamy Coconut popsicles
makes 8 popsicles that are about 2 oz each
1 1/2 cups (12 oz) coconut milk (I used reduce fat)
1/4 cup sugar
1/2 cup sweetened shredded coconut (plus more for the popsicle molds)
Stir coconut milk well, measure out. Whisk sugar into the coconut milk. Add sweetened shredded coconut and mix well. Place a pinch of shredded coconut into the bottom of each popsicle mold. Whisk milk/sugar/coconut mixture again and then pour evenly into each mold. Freeze for a couple hours before bringing to the party. Remind the hostess that they will need to run the mold under warm water to get the popsicles out.
Enjoy.

Read more...

First Birthday Cupcakes with Strawberry Frosting

Well, we have survived the first birthday party of our first child. It was everything a first birthday should be: full of fun, family, presents, and plenty of sugar.


We began the festivities by taking a little dip in the pool. James was not too sure about the water at first, it was not quite as warm as tub water, and felt especially cool when it reached his belly. But soon he learned that he could splash, just like in the tub, and pretty soon he was lovin' it.


Then we sang happy birthday and he got his very own cupcake. Of which he ate the entire thing, no problem.


Although he was exhausted by the time we opened gifts, he was excited about the toys, books, and one giant red bouncy ball that were given to him.


Needless to say, by the time we pulled away from the curb at the end of night, he was completely asleep, despite the copious amount of sugar he had consumed. Which brings me to the cupcakes.


They were, if I do say so myself (and I did, and my entire family made fun of me for it), incredible. The cake was extremely moist as the result of both buttermilk and sour cream in the batter, and the frosting, oh the frosting! It was so sweet and creamy and had just the perfect amount of strawberry flavor.


I also made mango and blueberry frosting, but did not like them nearly as much as the strawberry, so they were only used to decorate the cakes. You can make the frosting with any other fruit by substituting different fruit purees for the strawberry.


First Birthday Cupcakes with Strawberry Frosting
makes about 16 regular sized cupcakes and 12 mini cupcakes (so maybe about 20 regular sized all together?)
for the cake:
1 3/4 (about 8 oz) cup flour
1/4 cup potato starch
2 tsp baking powder
1 tsp salt
5 tbsp butter
1/2 cup sugar
2 eggs
1 cup buttermilk (I used lowfat)
1/3 cup sour cream (I used lowfat)
Preheat the oven to 350 degrees and line or spray muffin tins.
Combine flour, potato starch, baking powder, and salt in a bowl, set aside. Beat butter and sugar together until it resembles course sand. Add eggs one at a time, mixing well after each addition.
In a separate bowl, whisk together buttermilk and sour cream until most lumps are gone. Add the flour mixture and the buttermilk mixture to the sugar mixture, alternating, and starting and ending with the flour mixture.
Pour batter about 3/4 of the way up into prepared muffin tins. Fill any tins that are not being used with water.
Bake about 18 minutes, or until a toothpick inserted comes out clean. Let stand in the muffin tins five minutes before removing and letting the cupcakes cool completely on a cooling rack.


for frosting:
1/2 cup plus 2 tbsp pureed ripe strawberries
1 stick butter
about 4 cups powdered sugar
Beat the butter and strawberry puree together. Add sugar, 1/2 cup at a time. The frosting will seem runny. Cool in refrigerator about an hour before decorating cupcakes with the frosting.
Enjoy.

Read more...

Happy Birthday America AND Happy Birthday Mom!

Happy Fourth everyone!
When most people think of the fourth of July, they plan to light fireworks, barbecue burgers, and drink beer. When I think of the fourth of July, I think about celebrating my best friend, because today is my mom's birthday. (If I'm not mistaken, she is turning 39, again.)
I also think of flag cakes.


Almost every year of her childhood, someone made a rectangular birthday cake for my mom, smothered it in white frosting, and decorated it with strawberries and blueberries in the form of a flag. A few years ago, I decided to carry on this tradition. Each year, my cakes have become more attractive and elaborate. Last year I made one blue cake layer by pureeing blueberries and one red cake layer by pureeing strawberries. In between the cake layers and covering the cake was a thick layer of white whip cream, and the top displayed perfectly cut and placed berries to make it look just like our flag. It was truly a work of art.
This year, not so much. I'm trying to figure out the difference between last year and this year; why did I have so much more time last year?...


Well, for whatever reason, I wasn't quite as attentive to the cake this year, and I didn't coat the pan with enough cooking spray. So, of course, the cake stuck like it was glued. (This is a definite trend for me.) And, again, I ended up making trifle. Which, really, is all components of the cake that you would be eating, just not as neatly arranged. It is so simple that it hardly needs a recipe, but here it is anyway:


Flag trifle:
I used this cupcake recipe but poured the batter into cake pans instead, then cut (er, um, tore out of the pan) the cake into small chunks.
About 2 cups sliced strawberries and about 1 cup blueberries.
Whip cream:
1 pint of heavy whipping cream
1 splash (tsp?) of vanilla
3 tbsp sugar
Whip the heavy whipping cream in a stand up mixer on high or with a hand-held beater until soft peaks are formed, then add vanilla and sugar and whip until hard peaks form.
To assemble: Place a layer of cake chunks into the bottom of a medium bowl. Cover with 1/3 of the whipped cream. Sprinkle about 1/3 cup blueberries and 1/3 of the strawberries over the whipped cream. Repeat with next layer. On the third layer, make a flag with the remaining berries.
Wear your sunscreen, be careful driving, don't light fireworks, drive, or operate a bbq after too much beer, and, of course: Enjoy.


Read more...

Double Chocolate Mango Scones

This is going to sound ridiculous... oh gosh... I'm a little embarrassed, so I'll just say it and get it over with: I was totally obsessed with this show called Psych last fall when all I did was sit on the couch and feed a new born all day long (I put "was obsessed" in past tense only because I watched every episode that is currently available on netflix), and one time the main character (Shawn Spencer if anyone is interested) mentioned something so quickly and in passing that you would have only caught it if you were as consumed with baked goods as I am; he said: "double chocolate mango scones."


I haven't been able to get them out of my mind since. 
I feel that this is comparable to going to the mall and later suffering from buyers remorse over a particular dress you didn't purchase, and finally your wise friend says to you "You can't stop thinking about that dress, therefore you should buy it." Well, I don't dream of clothes... but I've dreamt of those scones. 


Today was definitely the day. To continue yesterdays drama, I was awake at 2:30 am for an hour, and then up for good at 5:30. And I must say, nothing is more comforting when you are deleriously tired than a chocolaty baked good. These scones were just the ticket: rich and indulgent, yet not too sweet. The mango is not overwhelming; my husband, who apparently doesn't "love mangoes," scarfed one down as soon as he was home from work, and then later for dessert. I, on the other hand, only had half of a scone. I'm really trying to watch what I eat. Psych.


Double Chocolate Mango Scones
Adapted from Cindy's Scones from her comment on this post (thanks again, Cindy!)
makes 12 scones (or 8 if you are like me)
 1 3/4 cup all-purpose flour
1/4 cup unsweetened cocoa powder

2 tablespoons sugar 
1 tablespoon baking powder 
6 tablespoons butter 
1 egg 
1/2 cup milk 
1/3 cup bittersweet chocolate chips
1/2 cup ripe mango, cubed

Preheat oven to 425 F. Assemble ingredients.
Food processor instructions: Add dry ingredients (flour through baking powder) to processor bowl. Add butter cut into several pieces, and process with steel blade until mealy in texture (it will look like beautiful brown sand). Add egg and milk and process just until the mixture holds together. Knead on lightly floured board. Sprinkle chocolate chips and mango on top, then knead in. Roll out to about 3/4" thick. Cut into wedges and bake on ungreased pan (wedges should not touch each other) at 425 for 8-10 minutes (I made them larger, so they took 12). Brush with egg or milk before baking if desired. If making more than one batch, there's no need to wash the bowl and blade between batches.

By-hand instructions. Blend dry ingredients in large bowl. Add butter and mix in with pastry cutter or fork or two butter knives, until mealy. Add egg and milk until the mixture holds together. Continue as above.


Note- the directions for this recipe were copied and pasted from a comment that Cindy made, then I put in a few notes.

Survey: Does my childs' lack of hair cut really make him look like a Justin Bieber want-to-be like people keep saying? Please say "no."

Read more...

Boccone Dolce (trifle)

I have been thinking a lot about birthdays lately, and why we celebrate them. Maybe because this is the first birthday that I really was not too excited about turning a year older (I know that you readers in the extremely-late-thirties crowd are rolling your eyes right now, but I'm just being honest).


I didn't think that 25 was that big of a deal until a friend asked me about a month ago how I was feeling about turning a quarter of a century. "The next big birthday is 30, you know," someone else said to me. That's when I really started thinking about it.


The first twelve or so birthdays are exciting because you have an excuse to eat as much sugar as you want, you get a bunch of fun toys, and all your friends get to come over. Then you're thirteen, finally a teenager. Then fourteen, entering high school. Fifteen you get your permit. Sweet sixteen you can drive. On and on the excitement builds... until about twenty five.


All the birthdays leading up to this year have made me look with excitement and anticipation at the year ahead. This year was different. This year, I felt myself looking back for the first time.


Maybe it was because this was my first year as a mother, and if any life situation should make you feel like you've grown up fast, parenthood is it. At any rate, I look back on twenty five blessed years of life that have rolled out in front of me, step by step. It seems that most of the time the next bit of the path was only visible as I was in the middle of stepping onto it. But I think that is what celebrating birthdays is about as you get older: celebrating your ability to adapt and cope and keep taking those life steps as they come, one at a time.
It is at this point in my rambling that I will bring us back to food. We will look at this dish as a micro-example of a larger life lesson: the ability to adapt as life happens.


Friday was my birthday, and I wanted- no needed- to make my favorite dessert in the whole world: boccone dolce. Imagine layers of meringue drizzled with chocolate and smothered with fresh seasonal berries and fluffy pillows of heavenly whipped cream. That is what I made, more or less.


The second life lesson of this post: waxed paper does not equal parchment paper. The meringue layers (which require about four hours, start to finish, plus a babysitter) are supposed to be baked on parchment paper. I thought the cheap equivalent, waxed paper, would work. So, so wrong. Instead of easily peeling off as the parchment paper would have done, the waxed paper melted to the meringue and formed a sticky adhesive that was pretty much impossible to remove. Except in chunks.
(Insert picture of my mother and I frantically trying to chisel off crumbling meringue pieces from the wax paper at the time I am supposed to be somewhere with completed boccone dolce in tow. Photo unavailable due to the situation just described.)


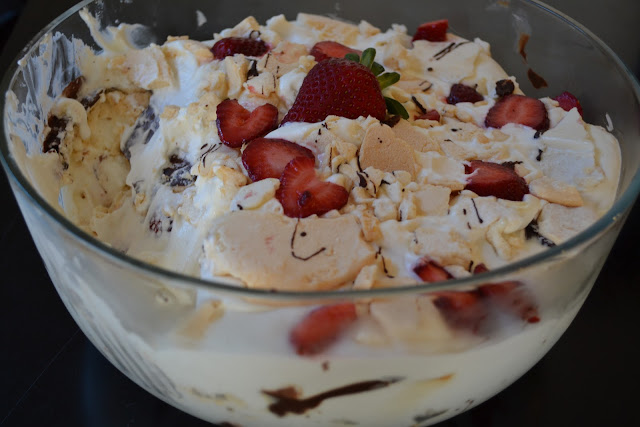
As a result, I- now being an extremely mature, level headed, rolling with the punches 25 year old- made boccone dolce trifle. Which was delicious and just what I had been craving, despite its appearance being far from the beautiful layered cake from Papa Haydns.
This recipe, which I shamelessly copied and pasted from this site and then wrote in my own notes, is supposedly the Papa Haydns' recipe. It tasted pretty dang close to me.


Boccone Dolce (trifle)
Serves: oh so many! 20 people who have already had dinner maybe?

For the meringue layers, you'll need the following:
1 1/2 cups egg whites
2 cups sugar
(about 4 hours, and a babysitter, as stated above)
1.  Whip the egg whites on high until they come to a stiff peak
2.  Turn down the mixture to medium speed and start adding sugar 1 Tablespoon at a time, every 2 to 3 minutes.  This allows the sugar to be absorbed.  You'll notice the meringue will become very thick and glossy.
3.  You will need to line a baking sheet with parchment paper.  Draw the circles (the size you want your meringue layers to be) on the under side of the parchment.
4.  Take a rubber spatula and start spreading the meringue inside the circles.
5.  Bake at 225 degrees for 2 and a half hours. (I only took about 2 hours, 10 minutes)  Meringue should be white in color and crispy all the way through.  If they're still soft after this time, you can bake them longer.  The low temperature will prevent them from browning too quickly. Let cool completely before carefully peeling off parchment paper.

For the sweetened whipping cream, you'll need the following:
4 cups heavy whipping cream
1 Tablespoon vanilla
1/4 cup sugar (or more, to your taste)
1.  Whip cream to soft peak
2.  Add vanilla and sugar
3.  Whip cream to stiff peak -- then it's ready to use.  The cream needs to be stiff in order for it to hold the meringue layers together.
4. Flavoring the whipped cream to compliment the fruit with a smidgen of spice like ground cardamom or an orange liqueur adds another a counter point to the classic vanilla.
You also need: 
- 6 cups berries (I used strawberries because they are in season in Oregon, and amazing. Use whatever you have fresh and local)- 8 oz melted semisweet chocolate (the recipe calls for 6, but 8 is more realistic in my chocolate-loving opinion)
Let's put together the Boccone Dolce:
1.  Put one layer of meringue on your serving plate (or 1/3 of the crumbled meringue chunks into the serving bowl)
2.  Drizzle melted chocolate over the layer
3.  Spread 1/4 of your whipped cream on top of the layer, and top with berries.
4.  Spread 1/4 of the cream on top of the berries.
5.  Repeat with next layer
6.  Top with 3rd meringue layer.  Drizzle with chocolate.
7.  Decorate with edible fresh flowers, fruit, mint or geranium leaves.  Enjoy!


Source: Papa Hyden’s Natasha Ohlman - Portland, Oregon


Read more...
\